Sablés aux noisettes & aux baies de berbéris : Les Vendredis Francophones

Quand l’adorable Mihl a décidé enfin de me rendre visite l’année dernière elle n’est pas venue les mains vides!  Parmi les trésors qu’elle a gentiment apportés avec elle  à travers l’Europe (ou bien, de l’Allemagne jusqu’à chez moi en Aquitaine) se trouvait un sachet de jolies baies de berbéris!  Elle en parle souvent et les utilise dans ses pâtisseries, donc j’avais hâte de les découvrir.  Vous ne connaissez pas les berbéris?  Allez faire un tour chez wiki pour plus amples infos sur ces petites baies acidulées pardi!

Une fois les berbéris en ma possession, que faire avec ces petits rubis comestibles?  Je n’étais pas en manque d’idées, et le plus dur était de me décider, ce que je fit enfin!

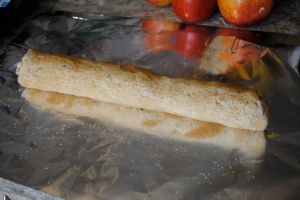
Il faut dire que nous avons beaucoup de choses en commun, Mihl et moi, parmi lesquelles nos chers souvenirs d’enfance avec nos grand-mères respectives.  Je voulais donc essayer de leur faire honneur avec cette recette, inspirée par mon arrière-grand-mère.  Ces sablés sont  sophistiqués dans leur subtilité, avec un mélange de textures surprenant, entre le croustillant du sablé sucré et les baies séchées acidulées.  La poudre de noisette ajoute une touche d’amertume qui joue avec la délicate douceur du sucre roux qui les entoure…si vous n’avez pas de baies de berbéris, des “cranberries” séchées non-sucrées feront l’affaire.

Sablés aux noisettes & aux baies de berbéris

Pour 40 biscuits environ

2 c. à café Ener-G (pour remplacer 2 oeufs)

2 c. à soupe d’eau

175 g beurre végétal (St. Hubert Bio), ramolli

2 c. à café de jus de citron

1 c. à café essence vanille

180 g de sucre glace tamisé

300 g de farine ménagère

2 c. à soupe Maïzena

1 c. à soupe levure chimique (un sachet de 11 g)

120 g de noisettes en poudre

110 g de baies de berbéris (ou cranberries séchées)

4 c. à soupe de sucre roux

1) Dans un grand saladier mélanger la farine, la maïzena, la levure chimique et la poudre de noisettes à l’aide d’une grosse cuillère.

2) Fouettez l’eau avec l’Ener-G à l’aide d’un mixeur électrique jusqu’à ce que ça mousse, 3 ou 4 minutes environ.

3) Dans un autre saladier, travaillez en crème le sucre glace et le beurre jusqu’à ce que le mélange blanchisse.  Ajoutez l’Ener-G, le jus de citron et la vanille en continuant de battre pour obtenir une pâte homogène et très légère.

4) Incorporez le mélange de farine, petit à petit, puis les baies.  Divisez la pâte en deux.

5) Etalez la moitié du sucre roux sur une feuille de papier aluminium d’une trentaine de cm long.  Farinez vos mains, et avec un des pâtons, formez une bûche ronde de 20 cm (si votre pâte est trop molle, malaxez-la avec un peu de farine, elle sera plus facile à manipuler).

6) Roulez doucement la bûche dans le sucre roux afin de bien garnir son extérieur.  Enveloppez-la ensuite dans une feuille d’aluminium en fermant les extrémités en papillote.  Faites pareil avec votre deuxième pâton, puis, laissez-les reposer au frigo pendant deux heures.

7) Préchauffez le four à 175°c et préparez 2 plaques de cuisson avec des silplats ou du papier sulfurisé.  Retirez l’aluminium et détaillez chaque bûche en tranches de 10 mm.  Si vous ne pouvez pas couper votre pâte facilement, mettez-la au congélateur pendant 15 minutes, puis réessayez.

8) Enfournez les biscuits pendant 13 à 15 minutes, jusqu’à ce qu’ils soient fermes et dorés en dessous.  Laissez-les tiédir 5 minutes avant de les mettre à refroidir sur une grille.

Miam!

Kid-Friendly Easy-Peasy Pasta (or the recipe that isn’t really a recipe)

I could count on one hand the number of times I’ve had fast-food anything in the past 10 years…but “fast-food”, that is to say, foods that can be prepared quickly, do have their place in our family’s meal repertoire.

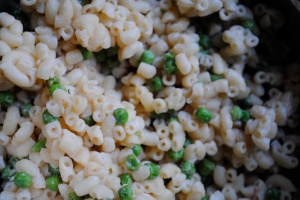
With Guppy and Monsieur F. home every day for lunch, I try to keep things interesting, nutritious and affordable.  And quick.  While there are lots of  healthy and delicious things that I can whip up in just minutes, not all of them pass the Guppy-test, but this one does and it’s ready to eat in less than 30 minutes.

I’m not going to complain here : our daughter was the easiest kid in the world to feed for 4 years.  She’d eat just about anything from spicy lentil curries to tapanade.  She’d have her moments, but generally was very easy to please.  However, since turning 5 she’s gone into a more curious food-phase where she likes everything, sometimes.  One day she’ll love artichokes, the next will gag on them.  I let it go, because as my dear Mamafish would say, “if she’s hungry, she’ll eat.”, but it is still nice to see her clean her plate.  Broccoli, peas, spinach and mushrooms are still her top 5 foods, so I try to use them as often as possible, and will sub one of the above for the peas in this dish…but I didn’t want to lose the cute name and call it “Mushy-peasy Pasta” or “Easy-ccoli Pasta”.  But maybe I should?

Kids love me, you’ll see!

Easy-Peasy Pasta

For the child who doesn’t like rice or peanut butter & jelly sammies.

500 g whole-wheat pasta (mini-macaronis are our favourite)

Pot full of boiling, salted water

1/2 cup diced onion

1 tbsp olive oil

2 tsp balsamic vinegar

3 tbsp non-dairy butter

3 tbsp nutritional yeast

3 tbsp soy cream, soy yogurt or non-dairy milk (in order of preference)

2 to 3 handfuls frozen peas, rinsed under hot water

1 or 2 diced meatless-dogs or sausage (optional)

Salt and pepper to taste

1) Prepare the pasta according to package instructions.

2) While the pasta is boiling, sautée the onion in the olive oil until translucent, about 5 minutes or so.

3) Add the balsamic vinegar and set heat to low, stirring to keep the onion from sticking, then add the butter, soy cream and peas and stir until combined.

4) Drain the pasta and return to the pot, add the balsamic onion mixture and the nutritional yeast and stir until combined.  Add optional soydogs (if you’re in North America you can use Yves and I’m jealous!) and salt and pepper.

5) Youppie!  Eat a happy meal with your kidlet!

*I feel kind of guilty calling this a recipe, because it’s just pasta…but pasta with stuff, makes it fancier, right?

Paratas, Please!

Para-whats?  Paratas!  Reminiscent of a Mexican tortilla, paratas are my go-to flat bread when it comes to Indian cuisine.  They are easy and really quick to prepare; it’ll take about 35 minutes total : 15 minutes down time while the dough sits, 15 minutes preparation, and about 5 minutes cooking time.  Now that’s my kind of fast food!

Like many small-town kids, I didn’t have my first taste of “real” Indian cuisine until my first visit to London.  Still in high school, I stayed with a wonderful young host family who would never have allowed me to step foot in a regular old Indian restaurant, no sir!  My curry-baptism was to be home-cooked, thank you very much, made with love and care.  Pauli, aka host-mum and chef extraordinaire, showed me how to make paratas that night – it was the first time I’d ever really done anything in the kitchen other than eat!  It was such an amazing evening – and I think of my sweet little host-family every time I have paratas.

Don’t let the directions intimidate you – you’ll see, it’s really easy!  Just follow these simple steps :

Our favourite paratas

for 8 paratas

300 g whole wheat flour

1/2 tsp flax seeds (optional)

1/2 tsp sunflower seeds (optional)

2 pinches of salt

200 ml soy milk

8 tsp non-dairy butter

1) Using a wooden spoon, mix together the flour and salt in a large bowl.

2) Add the soy milk, a little at a time, until a smooth-ish dough forms.  Knead it just a little bit : if it’s too sticky add a little bit of flour, or  add a little soy milk if it’s too dry to stick together.

3) Form into a ball and let it rest 15 minutes.

4) Now divide the dough into 8 balls.

5) Roll out the balls to form little tortillas, about 15 cm in diameter.

6) Put a 1/2 teaspoon of the butter on each disc, and spread it a little.

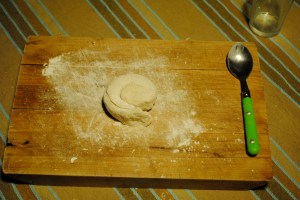
7) Now roll up the paratas so you get 8 cigars.

8) Let’s make snails!

9) Roll each snail out so that you get again 8 discs.

10) Now cook the paratas in a non-stick pan with a little melted butter over high heat.

11) Paratas are best when served hot from the pan, so serve and eat as soon as possible!

*Sorry for the yellowish pictures…it’s still dark come dinner time!

Meal Plan Monday & Tester Yummies

Before I get to this week’s plan, here are a few of the great eats I’ve been testing for The Urban Vegan :

Delicious cinnamon-date scones

Kheer (Indian Rice Pudding)

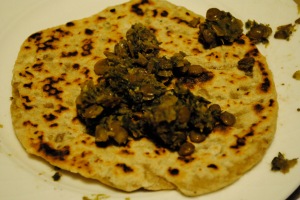
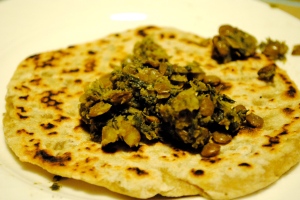
And to round things out, some Chana Dal served on homemade paratas.  I obviously can’t give you the tester recipe for the Chana Dal, but you can see the recipe for the paratas here in French, or wait until tomorrow for the English version.

Did you see who was sneaking into my Kheer photo shoot?

I was taking the shot and wondered what had fallen onto the table…baby lady birds! Or lady bugs, or cute bugs that announce spring!  Happy.

Monday : Easy-Peasy Pasta – watch for this very kid-friendly recipe on Thursday.

Tuesday : Balsamic Baked Beans (an U.V. tester recipe) and sweet potato fries.

Wednesday : French Fry Soup.  This is going to be an experiment, and I promise to share the results if it turns out!

Thursday : Spaghetti and bean balls.  I usually use the wonderful recipe for bean balls in VCON, but I’m out of gluten flour.  It’s all gone, kids, and apparently I cannot get any unless I order it via the net…and I’m not going to do that.  Have any of you made the recipe without the gluten to hold it together?  Do you have other bean ball recipes you like that don’t call for gluten flour?  Do tell!

Friday : Pizza Night!  Wee! If I’m feeling frisky I may even make a dessert pizza Friday.  Maybe.  Can’t be getting to crazy now, can we?


Do you blog your weekly meal plans?  Let me know, I’d love to link to your plan to share the planning mojo with everyone.  And don’t forget, if you’re looking for meal plan inspiration you can visit the MPM archives.

Qui veut des paratas? : Les Vendredis Francophones

Que-sont les paratas?  Similaire à des tortillas mexicaines, ces petites galettes indiennes s’invitent au repas facilement comme elles se préparent en un clin d’oeil et sont très facile à réaliser;  il vous faut 35 minutes en tout : 15 minutes de repos, environ 15 minutes pour la préparation et cinq minutes de cuission.  C’est du vrai “fast food”!

Lors de ma première visite à Londres j’ai pu enfin déguster de la vraie cuisine indienne.  Encore lycéenne, j’étais logée par une famille d’accueil fort sympathique qui ne se contentait pas de m’emmener au vulgaire resto du coin.  Pour mon repas initiatique c’était confection de repas en famille avec des petits plats maison mijotés avec amour.  Pauli, cuisinière accomplie, m’a montré comment confectionner  les paratas, et c’était la première fois que je faisais à manger – ou en tout cas aider – dans la cuisine.  Ce fut une soirée inoubliable, et je pense à eux à chaque fois que je fais  des paratas.

Ne soyez pas intimidés par les explications – vous verrez, c’est facile!  Suivez le guide…

nos paratas qu’on aime tant!

Pour 8 paratas

300 g de farine complète

1/2 c. à café grains de lin (facultatif)

1/2 c. à café lin de tournesol (facultatif)

2 pincées de sel fin

200 ml lait soja

8 c. à café de beurre végétal (St. Hubert Bio)

1) Dans un grand saladier, mélangez la farine avec le sel à l’aide d’une cuillère en bois.

2) Ajoutez petit à petit le lait, jusqu’à l’obtention d’une pâte souple et homogène.  Malaxer juste un peu : si votre pâte est trop humide, ajoutez un peu de farine, si à l’inverse elle est trop sèche ajoutez juste un peu de lait, une cuillère à café ou plus si nécessaire.

3) Laissez la pâte reposer 15 minutes.

4) Partagez la pâte en 8 boules.

5) Etalez les boules au rouleau pour former 6 galettes d’environ 15 cm de diamètre.

6) Déposez sur chaque galette 1 c. à café de beurre et étalez.

7) Roulez les galettes sur elles-mêmes afin d’obtenir 8 cigares.

8) Maintenant nous allons faire des escargots!

9) Etalez chaque escargot pour former une nouvelle galette.

10) Maintenant cuisez vos galettes dans une petite poêle anti-adhésive préalablement graissée avec un peu de beurre.

11) Ces galettes sont meilleures servies chaudes, directement de la poêle, donc servez-les sans attendre!

*ben ouais, il fait nuit à l’heure du dîner…désolée pour les photos jaunes!

Knitting for a niece (or a nephew?) : W.I.P. Wednesday

I’m very excited about being “Auntie Shellyfish” again (wee!), and thought I would put some of these new knitting needles to use for my future niece or nephew…though I’m sure the baby is a girl.  Don’t ask me why, just a hunch.

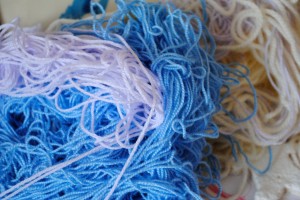
I got my first stitches cast on to make this sweet little hat.  I’m limited to using the yarn in my little stash, but wish I could use more vivid colours.  I’ve got more white and lilac baby yarn that I used for this scarf, and it should look sweet.  That yarn is so very soft, it’s a shame I don’t have more of it.

I’m also hoping to make these little booties because they are just so cute!  I love baby feet so much – baby toes are perhaps the cutest thing in the world, they must be protected! The pattern seems pretty easy (read : I can figure it out) so if I have enough yarn left over after the little beanie I’ll give it a go.

I’d have liked to use the blue pictured above for both the hat and the booties, but over the holidays Sam somehow managed to make his way into my workshop and he took out his frustration of being left at home on everything he found.  I was a bit heart-broken because he gnarled up 5 skeins of baby yarn I’d been saving.  More than gnarled up – they were stinky, too – so I had to trash them.  He also ate a few gifts I’d just finished making, which was a very heavy lesson in impermanence and in the absolute fleeting nature of the universe.  Sigh.

Have you had any of your works of love destroyed by a small child or pet?  I’m sure you have!

Do you have any new W.I.P.s in the works? We would love to see what you’re up to! Snap a shot of your  “in progress” masterpiece and add it to the  W.I.P. Wednesday Flickr Pool. Whatever your works-in-progress, have a crafty week, and don’t forget to see what the other Wipsters are working on.

A very delicious & low-fat chocolate cake…

If you took a peek at last week’s Les Vendredis Francophones then you saw this delicious chocolate cake I made for my mother-in-law’s birthday last week.  This is one of those cakes that will give your guests the impression that you’re a master pastry chef, and it is so crazy-easy that you’ll find yourself making it again and again.  I know that vegan cakes can sometimes run on the “heavy” side, but this one has a light, tight crumb that will leave people doubting it’s really vegan…

After a little trial and a bit of error, I bring you this low-fat delight with but a mere 40g (about 3 tbsp) of butter – apple sauce replacing the initial 3/4 cups the original artery-clogging recipe called for.  Tasty and modest in the fat department?  Who would have thought?

Serve this rich chocolate cake with a cup of espresso, or with your favourite non-dairy ice cream for extra-special birthday (or any day) fun!

low-fat vegan chocolate cake

2 tbsp Ener-G (or egg replacer of your choice for 2 eggs)

4 tbsp water

180 g brown sugar

40 g non-dairy butter, softened

225 ml apple sauce

60 ml soy milk

100 g unsweetened cocoa powder

200 g AP flour

1 tbsp corn starch

1 1/2 tbsp baking powder

1) Pre-heat your oven to 180°c and butter and flour a 25cm bunt pan.

2) Using an electric mixer, beat the Ener-G and water until frothy, then add the butter and sugar and continue mixing for about 5 minutes.  Next, add the soy milk and apple sauce and blend until smooth.

3) Sift in the cocoa powder, corn starch, flour and baking powder, and blend with a wooden spoon until “just mixed”.  If you stir too much you’ll have a chewy cake, and that would be sad.

4) Pour the batter into the prepared pan and bake for about 35 minutes, or until a toothpick comes out clean.  Let the cake cool in the pan for about 10 or 15 minutes, then gently reverse it onto a cooling rack.

5 ) This cake is quite lovely naked, but you could of course get fancy-pants with some chocolate ganache or lemony powdered sugar icing...and don’t forget the sprinkles!

bon appétit!

Meal Plan Monday: Theme-Night Family Fun & More tester treats…

Despite the amazing weather and sunshine, I’m feeling the January “blahs”.  I’m not sure if you experience these, but for me it happens shortly after the holiday decorations come down and the afterglow of December’s festivities is as dark as these winter mornings and evenings.  I am, if you will, like a flower…I need long days of sunshine and gentle warm breezes to nourish me.

Ha!

What do you do when you get the winter blahs?  This week The Fish Family will be having two “theme-nights” to break up the monotony of January.  Yes, we are throwing caution to the wind and serving up some festivesauce with an Irish Night and an Indian Night.  You’re jealous, aren’t you?

As many of you know, it really is the little things that matter, and though it might seem silly to tell Guppy, “Tonight, we’re travelling to India…” and spend our dinner talking about the animals, stories and people we could relate to the country of India, for the curious 5 year-old she is, it’s rather exciting.  I recycled a few old lesson plans I’d used for children and found some “Animals of India” colouring pages for her to work on while I prepare dinner tonight, and we could even extend the experience by watching “The Jungle Book” later in the week…it only takes a few minutes of planning to create an event out of what would otherwise be a boring Monday night dinner.

Theme-Night meals for teens or adults are not necessarily more labour-intensive, on the contrary!  Watching a film connected with your meal, or just the simple addition of pre-dinner cocktails, the apéro, if you will, can add sass and spark to a regular meal – even if your cocktails are non-alcoholic!

Smaller children will love making a game of something so ordinary, and it can help open up conversations with older kids, too.

Here’s our week :

Monday : Indian Night! Kale with raisins & Chana Dal* served with Paratas, and Kheer* for dessert.

Tuesday : Spirals with “Feta” & Spinach. – this one is from The Complete Guide to Vegan Food Substitutions by Celine Steen & Joni Marie Newman.  Many of you I’m sure all the recipes I teased you with while I was testing for this one (even though the silly publishers forgot to credit my name, grr!).  Now you can go get your own copy – you’ll be so happy you did!

Wednesday : Irish Night! Colcannon* with Irish Soda Bread and Seedcake* for dessert and Irish Coffee for the grown-ups!

Thursday : left-overs

Friday : Pizza Night!  This is our favourite night of the week, and we never grow tired of it.

The starred (*) dishes mentioned above are test recipes for The Urban Vegan’s book-in-progress, and here are a few pictures of what I was testing last week :

hot crossed buns

sweet mint tea

Shirley Temple (for Guppy!)

I’m actually testing much more than you’re seeing here, but with the absolute lack of daylight (Winter Blahs!) there has been a significant decline in food photos around here…long live March 21st!

Do you blog your weekly meal plans?  Let me know, I’d love to link to your plan to share the planning mojo with everyone.  And don’t forget, if you’re looking for meal plan inspiration you can visit the MPM archives.

un gâteau (presque) léger au chocolat : Les Vendredis Francophones

C’était l’anniversaire de ma belle-maman cette semaine – joyeux anniversaire encore belle-maman! – et qui dit anniversaire dit gâteau!  Ce gâteau simplissime est même (presque) léger comme il n’y a que 40 g de beurre!  En effet, notre amie fidèle … Continue reading

W.I.P. Wednesday : Needles…

My MIL was quite the fibre artiste in her day, though since I’ve known her she’s had too much pain in her hands to do much crochet or knitting.  Today she gave me these…

Mostly crochet hooks…so now I really have no excuse.  I need to get cracking on the crochet!  You may be wondering why the aforementioned MIL doesn’t teach me how to crochet.  She’ll be the first to tell you she just can’t do it.  She has no patience at all.  She tried to show me how to knit, and the lesson lasted 5 minutes, however, when my SIL taught me, I learned in 5 minutes.  Some people are born teachers, others, well, not so much.

Thanks for all your answers concerning last week’s question about how much yarn one should buy…I so appreciate it, and I know there are lurkers who are thankful, too!

Do you have any new W.I.P.s in the works? We would love to see what you’re up to! Snap a shot of your  “in progress” masterpiece and add it to the  W.I.P. Wednesday Flickr Pool. Whatever your works-in-progress, have a crafty week, and don’t forget to see what the other Wipsters are working on.