W.I.P. Wednesday – Sewing & Sowing…

Hi kids!  I’ve missed you, really I have, and I’ve been thinking of most of you (well, not you lurkers since I don’t know who you are) whilst playing in my garden.  I think my vegetable plot and garden have become the most cared-for of “works in progress” around the Fish household.  I will share a full-on garden-nerd post soon, but this post is really about getting you caught up on a few crafts I have managed to pull off…a little sewing in between the sowing, if you will…

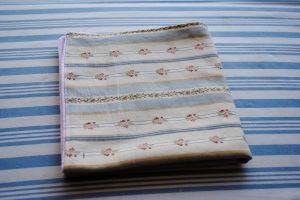
When last we “W.I.P.”ed together I told you about the cloth napkin I was making for Guppy which was going to double as a doudou.  I’m thrilled to say that it was a success with both Guppy, who loves it and uses it for sadness-free lunches at the school cafeteria, and also with the school’s auxiliary staff who are thankful it’s so easy to recognise and has her name embroidered on it (making noon-time napkin identification much easier for them!).  The pink cotton side is from one of Guppy’s receiving blankets, and the cotton canvas fabric was a gift from a good friend, so lots of great lovey-vibes went into the making of this napkin.

This was my first embroidery project that was to get so much use, and I admit I was a wee bit concerned about it initially.  It’s been washed loads of times so far, however, and has stood the test of abuse just fine.  The only bit that’s been wonky is the, for lack of a better word, “slishy” blue floss I used for the poodle.  I don’t think I’m going to be using this floss for anything in the near future as it just keeps slishing and sliding itself untied and I end up with a few sloppy stitches after the wash, but it seems to be fixed now.

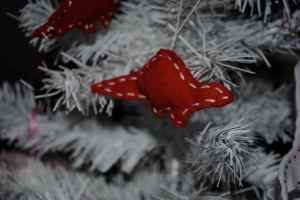
The other project of interest was these little heart pins Guppy and I made for her teachers and the staff at her school :

Guppy picked the colours for the fabric and the embroidery floss, assembled the halves, and I did the stitching.  I found these adorable checked wax-paper bags in my workshop – I wish so much I could remember where they came from because I want more! – and we put a giant heart-shaped vegan sugar cookie with lemon icing and heart sprinkles in each bag, delivered with each heart pin.  They were the perfect fit, and made giving a sugar cookie a little more elegant, really.  I mean, sugar cookies are classy, but that just added a little touch of professionalism to the deal.

Do you have any new W.I.P.s in the works? We would love to see what you’re up to! Snap a shot of your  “in progress” masterpiece and add it to the  W.I.P. Wednesday Flickr Pool. Whatever your works-in-progress, have a crafty week, and don’t forget to see what the other Wipsters are working on.

The doudou disguised as a napkin : W.I.P. Wednesday

After being a bit over-zealous in the furniture-lifting department I hurt my traps last week, which meant not much blogging, knitting or much of any activity.  They are feeling better now, though, which is good, because as you’ve noticed I’m out of pre-written posts – I’m blogging by the seat of my pants!

Some of you might be wondering what a doudou is.  In French, a doudou is an object of substitution children use to feel secure when apart from their parents : a blankie, stuffed animal, dolly, etc.  I’m pretty sure you’ve worked out “napkin” for yourselves.

The French school day is a bit longer than in many other countries :  5-year-old Guppy’s classes begin at 9 a.m., she has a two-hour lunch break from noon to 2 p.m., then classes until 5 p.m.  (Some children stay at the after-school programme /day care, making it an even-longer affair).  Though it hasn’t always been the case, I’ve been able to fetch Guppy and she’s had lunch at home with us since September, which she loves.  It’s much calmer, and she gets to read or play in her room (or snuggle her mamafish).

This is going to change, however, and she’s going to be eating once a week at la canteen or school cafeteria, much to her chagrin.  Her response to the announcement was, “but Mumma, I love you too much – that’s too many hours!”.   There’s no way around it, however, even if it’s hard to see your kiddo in distress.

So what do you do?

You make a doudou!

But shhhh!  It’s a secret doudou, don’t tell anyone!

The children bring a cloth napkin on the days they eat at the cafeteria, so I’m getting all Jamie Bond and making her what appears to be a napkin, but in reality, it is a secret, soft and reassuring doudou.

I’ve embroidered her name, and she picked out a few designs she wanted to  use to embellish it.  The above poodle is from the Stitch-it-Kit which has lots of cute retro designs I never use, but because I wanted to empower the Gup I handed her the box of transfers and let her pick out what she wanted (so glad she didn’t go with the hula girl).

The napkin will be made of two layers of fabric : a cotton twill, functional but cute (it has flowers on it, she picked it out) and the other side (the doudou side) is soft pink flannel I cut from one of her receiving blankets.  I assured her I would put lots of extra love between the two layers so that if she starts to have a gros chagrin (wave of sadness) she can give it a squeeze and she’ll feel better (I strongly suggest adding extra love if you’re trying this at home.  A little love is good, but not potent enough).

I just started it last night, so I haven’t finished yet, but I’ll show you next week…if you promise to keep this under wraps!  We don’t want any unnecessary teasing at school now, do we?

Do you have any new W.I.P.s in the works? We would love to see what you’re up to! Snap a shot of your  “in progress” masterpiece and add it to the  W.I.P. Wednesday Flickr Pool. Whatever your works-in-progress, have a crafty week, and don’t forget to see what the other Wipsters are working on.

Knitting for a niece (or a nephew?) : W.I.P. Wednesday

I’m very excited about being “Auntie Shellyfish” again (wee!), and thought I would put some of these new knitting needles to use for my future niece or nephew…though I’m sure the baby is a girl.  Don’t ask me why, just a hunch.

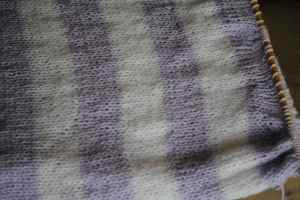
I got my first stitches cast on to make this sweet little hat.  I’m limited to using the yarn in my little stash, but wish I could use more vivid colours.  I’ve got more white and lilac baby yarn that I used for this scarf, and it should look sweet.  That yarn is so very soft, it’s a shame I don’t have more of it.

I’m also hoping to make these little booties because they are just so cute!  I love baby feet so much – baby toes are perhaps the cutest thing in the world, they must be protected! The pattern seems pretty easy (read : I can figure it out) so if I have enough yarn left over after the little beanie I’ll give it a go.

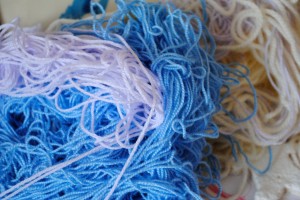
I’d have liked to use the blue pictured above for both the hat and the booties, but over the holidays Sam somehow managed to make his way into my workshop and he took out his frustration of being left at home on everything he found.  I was a bit heart-broken because he gnarled up 5 skeins of baby yarn I’d been saving.  More than gnarled up – they were stinky, too – so I had to trash them.  He also ate a few gifts I’d just finished making, which was a very heavy lesson in impermanence and in the absolute fleeting nature of the universe.  Sigh.

Have you had any of your works of love destroyed by a small child or pet?  I’m sure you have!

Do you have any new W.I.P.s in the works? We would love to see what you’re up to! Snap a shot of your  “in progress” masterpiece and add it to the  W.I.P. Wednesday Flickr Pool. Whatever your works-in-progress, have a crafty week, and don’t forget to see what the other Wipsters are working on.

W.I.P. Wednesday : Needles…

My MIL was quite the fibre artiste in her day, though since I’ve known her she’s had too much pain in her hands to do much crochet or knitting.  Today she gave me these…

Mostly crochet hooks…so now I really have no excuse.  I need to get cracking on the crochet!  You may be wondering why the aforementioned MIL doesn’t teach me how to crochet.  She’ll be the first to tell you she just can’t do it.  She has no patience at all.  She tried to show me how to knit, and the lesson lasted 5 minutes, however, when my SIL taught me, I learned in 5 minutes.  Some people are born teachers, others, well, not so much.

Thanks for all your answers concerning last week’s question about how much yarn one should buy…I so appreciate it, and I know there are lurkers who are thankful, too!

Do you have any new W.I.P.s in the works? We would love to see what you’re up to! Snap a shot of your  “in progress” masterpiece and add it to the  W.I.P. Wednesday Flickr Pool. Whatever your works-in-progress, have a crafty week, and don’t forget to see what the other Wipsters are working on.

W.I.P. Wednesday : More Knitting…

I finished up last week’s scarves, and started up this one which I’m hoping will be part of a scarf and mitten set.  The last scarf I finished had such thin yarn that this stuff feels so bulky, even though I’m only using 6mm needles – funny how everything is relative.  This yarn was a score from the outdoor market where we used to live; they were selling discontinued styles in bundles of six skeins.  Wish I’d have bought up more!  I love it, but it is a little more scratchy than the pink and white.

Hey, experienced knitters/crochet artists out there – how much yarn to you buy when you see some you love but have no real project in mind?  A few skeins?

Do you have any new W.I.P.s in the works? We would love to see what you’re up to! Snap a shot of your  “in progress” masterpiece and add it to the  W.I.P. Wednesday Flickr Pool. Whatever your works-in-progress, have a crafty week, and don’t forget to see what the other Wipsters are working on.

W.I.P. Wednesday : Finishing Up Scarves…

A short post to show you what projects I’m trying to finish up…

a bit girly, non?

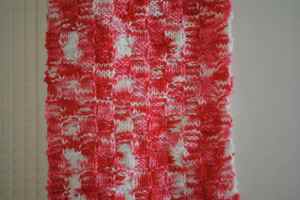
This one came together really quickly, but I had just a bit more to add to make it long enough.  I have this thing with short scarves, I don’t know what it is, but they drive me crazy.  If it’s not long enough for me to wrap it around my neck at least once with one end over each shoulder, it’s just too short.

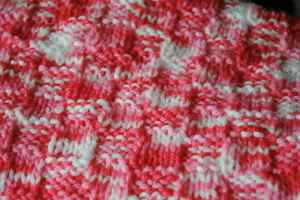
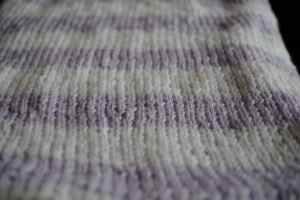
I’ve had a love/hate relationship with this scarf since I started it back in October.  I love the super-soft baby weight acrylic yarn, it’s like a little puffy cloud of sweetness.  I bought a big bag of 6 skeins when it was on clearance last year, and I now wish I’d have bought more it’s so lovely.

Can you see the mistake?

Anyway, the yarn is fantastic, but it’s so thin, and using the 4mm needles does take a long time.  The other frustration was when the needles were pulled out – much harder to slip them back in than when using 8s or 10s!  I’ve put it away twice to do other things, but need to get it done as it was supposed to be a holiday gift for one of my nieces, but is obviously still not ready.  I hope to finish it up by this weekend.

Do you have trouble finishing up your started and almost done projects?  It’s so funny, but the closer I am to completing the craft, the slower going it seems to be.  Must be because the challenge is over…


W.I.P. Wednesday : Basic Unlined Felt Stocking

The big count-down is on, kids, and if you’re like me, you’ve still got gifts to make and cookies to bake.  I was working on this relatively easy, unlined felt stocking today and thought I’d share this idea with you.  Depending on how fast you embroider and sew, this can be a very quick project.

These were for Guppy’s teachers this year.  I didn’t think to take a picture until we were leaving for school, hence the horrible lighting in the pre-dawn hours of 8:30am!  You can hardly make them out, but there are snow flakes above the trees…

You’ll need :

  • Vegan felt.  I used the vegan felt made from recycled plastic bottles I’ve blogged about before.
  • Embroidery Floss & Needle
  • Pencil or something to trace your pattern on.
  • Christmas stocking to use as a model (if you don’t have a stocking at home, just free-hand it or google it, there are lots of them out there).
  • Scissors, thread and optional sewing machine (you can hand sew this quickly).

1) Start by tracing your stocking shape onto your felt.  The quickest way to do it is to line up your two pieces of felt back to back, or fold a larger piece in two, then pin together.  That way you’ll only be cutting once.

2) Once you’ve cut out your felt, you’ll want to draw a little something on it to embroider.  If you’re in a hurry (it is 3 days to Christmas) try to make your design rather simple.  I just free-hand using a fat pencil.  If this scares you (it did me the first time) practice a few times on a piece of paper first.

I just free-handed this little elf girl, see the minimalist lines, etc. She’s not done, yet – I still need to give her a smile!  Snowmen, Christmas trees, etc. work well here as they require few details yet still look lovely.

3) Embroider!  Some people prefer sewing first, then doing the embroidery, but I find that because there isn’t much room to move inside the stocking it’s easier to embroider first, then sew. Look at the “How To” section at the top of the page for tutorials on basic embroidery, or again, google it.  There are many helpful videos on YouTube, too.  I just used a basic split-stitch for most of this little elf, but do what is easiest for you.

4) If the idea of embroidery scares you, just add a few appliqués.  Follow the technique for the Basic Holiday Ornaments to get fun shapes, then handsew them onto your stocking – just be sure to allow for a seam allowance, or your adorable shapes will be swallowed by the seams! Aaak!

5) Fold over the opening of your two halves to finish them off and give them a nice, finished seam.  The best is to fold over once, then fold over again so the raw edge is tucked up nicely.  The amount is up to you, just be sure it’s not too bulky and that it’s the same on both halves.  Sew them up with your machine (faster) or by hand (not terribly slow, if you’re only making one stocking).

6) Now it’s time to sew the two halves of your stocking together.  Pin them right sides together, like so :

Now just sew along the edge, giving yourself about a 1/4 inch seam allowance, and turn inside out! You might also want to add a little bit of ribbon to the top for hanging, or embellish with ribbons, etc.

I don’t actually have a finished picture of this one as I should be sewing it rather than writing a blog post about it, but to see a finished one, just again refer to the first photo in this post!  Hopefully this one will be sewn up and stuffed with goodies before next year…

Do you have any ideas for quick, last-minute gift ideas?  Just remember, it’s ok.  No matter what you’ve made or who you’ve made it for, it really is the thought that counts, no matter how trite that sounds.

W.I.P. Wednesday will be back next year!  It’s going to be an exciting year, and there will much going on.  I can’t wait!

Better Salt-Dough Decorations : W.I.P. Wednesday

Making salt-dough decorations is a fun and inexpensive way to get festive  with family or friends.  It’s become a bit of a tradition, and every year we look forward to it.

You might be wondering how we could be making these decorations for a third year in a row, but keep in mind : primo – We had almost no decorations when we first started; secondo – They don’t only hang on the tree! We’ve got decorations hanging around the windows, picture frames, even random nails that were left in the walls by our home’s former occupant.

We don’t make a huge amount each time, and there is always some “spoilage”, ornaments that break from years past.
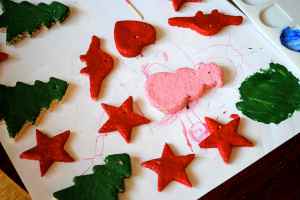
All this blathering on, but not telling you why I’m blogging about them, again.  Simply put, I’ve come up with a better formula that I find makes for more sturdy, beautiful ornaments.  Additionally, I’ve got an improved drying technique that I think has allowed for thicker decorations, allowing for more fragile design reinforcement.

Just like last week’s ornaments, for these you’ll need minimal supplies :

  • Cookie cutters!  If you’re thinking “I don’t have any cookie cutters, Shellyfish!”, just hold your horses.  Bowls, juice glasses, etc. make wonderful circles, and I’ll bet your kids or nephews or sibs have some fun shape-making gear they use with their Play-Doesque toys.  Look around, you’d be surprised what you’ll find with an open imagination. Libby, dinosaurs are wonderful here, too, obviously!
  • Flour! This is not the time for your organic, whole wheat variety.  Save that for your cookies.  Use the cheap-o white bleached stuff, or get creative with buckwheat (pretty colour) or corneal (fun texture) and regualr flour combos.
  • Salt!  This year I got crazy and used large sea salt, mostly because I wanted to change-up the texture.  I liked the results, but regular fine salt will give you a more classic, less rustic, look.
  • Glycerine or heavy, neutral oil.  If you have some glycerine, often used in home cosmetics, it’s the best choice, however, don’t get frowny-faced if you don’t.  Heavy oils like apricot would work well, but regular vegetable will work in a pinch.

Naked

See the lovely salt? You could add food coloring to the dough, and it would look lovely with the large bits of sea salt mixed in, I think.

This project is best spread out over several days.  Your first day is making the dough and cutting out your shapes, the next few days will be for drying out the ornaments (depending on which technique you use, more on this below), then painting and drying, and finally an optional painting session for adding detail or a second coat of paint.  This is important to keep in mind if you’ll be working with children.  Depending on their ages (or temperaments) you could do the cutting and drying first, then allow them to paint, or break the project up into multiple days, which is what I did with Guppy.

Better Salt-Dough Decorations

1 part salt (I used a glass to measure)

1 part flour

3/4 parts warm water

2 to 4 tablespoons glycerine or vegetable oil

Food colouring (optional)

Mix the salt and flour in a bowl, then add the water, a little at a time until you get a smooth dough, not too sticky (add more flour if need be) and not too stiff (add more water).  Add the glycerine and optional food colouring, and knead until it’s well blended and sleek and pretty.  Now set aside, loosely covered, for about an hour.

Now roll out your dough as if it were cookie dough (but don’t eat it, blek!) on a piece of parchment paper, or just form into objects if you’d like.  Once you’ve rolled out your dough and cut out your shapes you’ll need to let them dry. It’s important to let them dry out really well before painting, because if they continue to dry once you’ve applied paint it could crack and not look as you’d hoped.  Just keep in mind that the thicker your dough, the longer it will need to dry.

Please, before you begin drying your ornaments, be sure to remember to poke a small hole using a toothpick or knitting needle or whatever so that you can hang them up.  Once they’re dry, it’s too late.

Drying Method 1) Place your decorations on a radiator or furnace register and leave them there for a day or two (or in my case, leave them for about 4 days).  I cut out the shapes while Guppy was sleeping and when she woke the next morning she declared “Mumma, you’ve decorated the radiators!”.  See, you’re already decorating and they’ve not been painted yet!

Drying Method 2) Bake your decorations on parchment paper-lined baking sheets at about 80°c/175°f for a few hours.  You don’t want your oven hot, because it will cause the decorations to crack or bubble up – not good, unless that’s what you’re going for.

Drying Method 3) This is the method I would recommend as it seems to work the best for us.  Simply combine methods 1 and 2!  I suggest starting by drying the decorations on the radiator or similar surface for at least 24 hours, then baking them.

Decorating is fun and also can be as sophisticated or basic as you choose.  We start with some paint – you can use anything, really, markers work well, too.  Once the first coat of paint has dried you can add details, or go the way of the glitter.  Painting on glitter is easy : My method is using common white household glue and mixing it with glitter and applying it with a paintbrush.  When the glue dries it leaves behind a lovely shine and glitzy glitter. Gold or sliver spray paint would also be fun.  I have some and hope to play with it a little if I have time…

Just remember to have fun, no matter which technique you use!

* A special danke to Mihl & P for sending us some really special cookie cutters.  They made this year’s decoration creation session extra special!

Sewing Basic Holiday Ornaments Step By Step : W.I.P. Wednesday

Last week I blogged about the famous “Cookie Cutter” ornaments I make every holiday season, and about how quick and easy they are to make.  Then, after an email and a few comments it dawned on me that easy is a rather subjective word.  For someone who has never tried to thread a needle or tried to sew (gasp!) for fun, well, not so much.

If you’ve got sewing experience then this post will probably bore you, but if you’ve got pointers or URLs with other more basic holiday projects to share in the comments section, please do.

So let’s sew up an ornament together!  It’ll be fun, promise.  You’ll need a few basic things to get started, things you may already have around the house!

What you’ll need :

  • Cookie cutters or other shapes you can trace as patterns, unless you’re going to free-hand your drawing, which is also fun, especially if working with little kids who love seeing their drawings “come to life”.
  • Sharp scissors
  • Thread – So many choices!  Cotton thread, or thicker, more durable craft thread, embroidery thread (you’ll want to use about 2 or 3 strands) or even some thin cotton yarn.  I have also used very thin satin ribbon which is pretty, too.
  • Fabric – Before you run out to buy some, or think you can’t give the project a go because you haven’t any, just stop.  You can use nearly anything!  A re-purposed dish towel, the sleeve of a torn cotton shirt, bits from a stained table cloth, etc.  You can also use heavier craft paper – it looks lovely sewn.
  • A needle for sewing and some pins to hold your fabric together.  In a pinch you can use tape to keep the pieces together, and even paper clips.

Get your fabric and fold it in half, with the right sides together.  This just means that the side of the fabric you’d like to see once your decoration is done faces the inside for now.

See what I mean?  The red-checks are facing in and the boring backing is facing out.  Perfect for drawing or tracing on.  Because we make a few new decorations every year, they are like little snap-shots of the past.  We love dinos, so we make a few each year.  If your child (or husband) likes super heroes, try a cape with an S on it, or maybe an outline of a car.  Don’t worry about it not being traditional!  I still need to make a zombie for Monsieur Fish, because that’s what he loves, but haven’t got it worked out yet.

Once you’ve traced, pin the fabric together and cut it out, going through both layers of cloth.

Now put the wrong sides together, right sides facing out, and pin to secure.  Ready to sew?  First, let’s look at your needles…

Notice how the top needle has a rather large eye and a blunt end?  That’s an embroidery needle, so it can handle thicker threads, embroidery thread, yarn and ribbon.  The tinner, sharper needle will work with cotton or nylon thread. Let’s thread your needle!

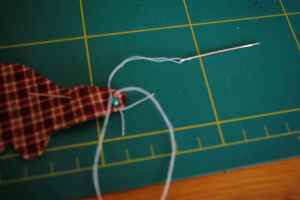
You want to have a workable length of thread, not too long or it’ll get tangled up, too short, and you’ll be re-threading often.  About from your hand to your elbow is a good size I think.  If you’re using regular cotton thread, just feed one end through the eye of the needle, then bring it to meet the other end so you’ve got a double-layer of thread (more sturdy).  If using embroidery thread, take two or three strands, feed one end through the needle and pull to about half-way the total length, then knot the long end.  It’s already sturdy enough so you don’t need to double up.

For your first stitch, you’ll begin going from the inside of your “sandwich” of fabric from the wrong side of one piece to its right side (meaning outside the dino here).  Gently pull until the knot is against the fabric, and tuck in or carefully trim any little tails that are left.  We’re going to do a straight stitch here, but to make things even easier, think of it as an in and out stitch. You just bring the needle through from one side to the other, all the way around your shape.  Stop a bit before getting all the way around to stuff it if you’d like.  You can use scrap yarn and thread, or cotton or nylon batting. Then sew up the hole and tie a knot to secure.

I hope this is helpful, and inspires you to make a few ornaments for your tree or window or potted plant or whatever.  The tutorial for the Felt Doughnuts may also be helpful for you, too.  They also make cute decorations for you tree, Jeni Treehugger says so herself!

Here are a few flashed-out examples of other shapes to try…


W.I.P. Wednesday on Thursday & We have our winners!

The lack of light has been reeking havoc on my photos, and I know many of you can relate.  I had a great post prepared for making holiday ornaments and decorations, but didn’t get to shoot it properly, so that’ll be for next week, and hopefully on Wednesday.  Whatevers.

I’ve blogged about these ridiculously easy felt ornaments before.  You just use your favourite cookie cutter (or anything) and use it to trace your desired shape onto your chosen fabric and sew it up.  Tah-da!

But you don’t so much care about that – you want the winners!  I’m not offended and totally understand.

The winner for the chocolate bar post was number 5, and for the tea it was 20.  You’ll just have to believe me folks, I still don’t know how to take a still of the random number thingy.

Jojo of Vegan In Brighton will be sent some a dark chocolate with quinoa (so good!) and Fanny from Vegan Up North is getting some tea.  Which kind? I’ll decide!  Ladies, would you be so kind as to email me at fishbowlmusings (at) gmail (dot) com and I’ll get your goodies off to you soon.