Better Salt-Dough Decorations : W.I.P. Wednesday

Making salt-dough decorations is a fun and inexpensive way to get festive  with family or friends.  It’s become a bit of a tradition, and every year we look forward to it.

You might be wondering how we could be making these decorations for a third year in a row, but keep in mind : primo – We had almost no decorations when we first started; secondo – They don’t only hang on the tree! We’ve got decorations hanging around the windows, picture frames, even random nails that were left in the walls by our home’s former occupant.

We don’t make a huge amount each time, and there is always some “spoilage”, ornaments that break from years past.

All this blathering on, but not telling you why I’m blogging about them, again.  Simply put, I’ve come up with a better formula that I find makes for more sturdy, beautiful ornaments.  Additionally, I’ve got an improved drying technique that I think has allowed for thicker decorations, allowing for more fragile design reinforcement.

Just like last week’s ornaments, for these you’ll need minimal supplies :

  • Cookie cutters!  If you’re thinking “I don’t have any cookie cutters, Shellyfish!”, just hold your horses.  Bowls, juice glasses, etc. make wonderful circles, and I’ll bet your kids or nephews or sibs have some fun shape-making gear they use with their Play-Doesque toys.  Look around, you’d be surprised what you’ll find with an open imagination. Libby, dinosaurs are wonderful here, too, obviously!
  • Flour! This is not the time for your organic, whole wheat variety.  Save that for your cookies.  Use the cheap-o white bleached stuff, or get creative with buckwheat (pretty colour) or corneal (fun texture) and regualr flour combos.
  • Salt!  This year I got crazy and used large sea salt, mostly because I wanted to change-up the texture.  I liked the results, but regular fine salt will give you a more classic, less rustic, look.
  • Glycerine or heavy, neutral oil.  If you have some glycerine, often used in home cosmetics, it’s the best choice, however, don’t get frowny-faced if you don’t.  Heavy oils like apricot would work well, but regular vegetable will work in a pinch.

Naked

See the lovely salt? You could add food coloring to the dough, and it would look lovely with the large bits of sea salt mixed in, I think.

This project is best spread out over several days.  Your first day is making the dough and cutting out your shapes, the next few days will be for drying out the ornaments (depending on which technique you use, more on this below), then painting and drying, and finally an optional painting session for adding detail or a second coat of paint.  This is important to keep in mind if you’ll be working with children.  Depending on their ages (or temperaments) you could do the cutting and drying first, then allow them to paint, or break the project up into multiple days, which is what I did with Guppy.

Better Salt-Dough Decorations

1 part salt (I used a glass to measure)

1 part flour

3/4 parts warm water

2 to 4 tablespoons glycerine or vegetable oil

Food colouring (optional)

Mix the salt and flour in a bowl, then add the water, a little at a time until you get a smooth dough, not too sticky (add more flour if need be) and not too stiff (add more water).  Add the glycerine and optional food colouring, and knead until it’s well blended and sleek and pretty.  Now set aside, loosely covered, for about an hour.

Now roll out your dough as if it were cookie dough (but don’t eat it, blek!) on a piece of parchment paper, or just form into objects if you’d like.  Once you’ve rolled out your dough and cut out your shapes you’ll need to let them dry. It’s important to let them dry out really well before painting, because if they continue to dry once you’ve applied paint it could crack and not look as you’d hoped.  Just keep in mind that the thicker your dough, the longer it will need to dry.

Please, before you begin drying your ornaments, be sure to remember to poke a small hole using a toothpick or knitting needle or whatever so that you can hang them up.  Once they’re dry, it’s too late.

Drying Method 1) Place your decorations on a radiator or furnace register and leave them there for a day or two (or in my case, leave them for about 4 days).  I cut out the shapes while Guppy was sleeping and when she woke the next morning she declared “Mumma, you’ve decorated the radiators!”.  See, you’re already decorating and they’ve not been painted yet!

Drying Method 2) Bake your decorations on parchment paper-lined baking sheets at about 80°c/175°f for a few hours.  You don’t want your oven hot, because it will cause the decorations to crack or bubble up – not good, unless that’s what you’re going for.

Drying Method 3) This is the method I would recommend as it seems to work the best for us.  Simply combine methods 1 and 2!  I suggest starting by drying the decorations on the radiator or similar surface for at least 24 hours, then baking them.

Decorating is fun and also can be as sophisticated or basic as you choose.  We start with some paint – you can use anything, really, markers work well, too.  Once the first coat of paint has dried you can add details, or go the way of the glitter.  Painting on glitter is easy : My method is using common white household glue and mixing it with glitter and applying it with a paintbrush.  When the glue dries it leaves behind a lovely shine and glitzy glitter. Gold or sliver spray paint would also be fun.  I have some and hope to play with it a little if I have time…

Just remember to have fun, no matter which technique you use!

* A special danke to Mihl & P for sending us some really special cookie cutters.  They made this year’s decoration creation session extra special!

Vegan MoFo Day XIV : W.I.P. Wednesday’s Vegan Etsy Delicious

We’re almost there, kids! Only six days of Vegan MoFo left.  It’s like we’ve reached mile 20 of the blogging marathon, so take in some carbs, a little water, and hold tight!  The most frustrating thing about MoFo for me, is that I just can’t take the time to comment on my favourite blogs – too many posts, not enough time.

This is W.I.P. Wednesday’s final post dedicated to the creative and talented vendors of the Vegan Etsy team, and what better way to round things off than with some food-related goodness?

Sweet V Confections doesn’t ship to France (I wonder why?), but if you’re in the U.S. you can actually order vegan goodies!

Why not send someone a vegan cookie basket this holiday season?  I think just about anyone would be excited to receive 4 dozen cookies…don’t you?  It’s probably a good thing they don’t ship here, I’d be ordering myself cookies left and right.

If I’m ever near Daton, Ohio in the U.S. I know I’m going to get my hands on some of these :

These chocolate vinkies should be on every table…at least I think so.  They even offer local delivery Ohio people.  Who knew?  With a name like The Bombshell Bake Shop I’m sure there is a little rock and roll in those treats.

You’re not supposed to eat this Pink Grapefruit Vegan Swirl soap from The Vegan Soap Kitchen, but I’m sure it smells delicious.  I want all of her soaps – my shower would smell so gourmet.

While these aren’t actually edible, I do think these  candy cane horns I think they would be really adorable on Guppy, who is all all about costumes, dressing-up and make-believe.  April has beautiful beadwork and other fanciful things in her shop, go look!

Don’t forget to keep up to date with the Vegan Etsy Team and their happenings over at their blog, and remember – a part of their proceeds always goes to supporting animals in need.

Have you begun your holiday gift making and crafting?  I’d love to know what you’re making me.  It’s nearly December already!

W.I.P. Wednesday Vegan MoFo Edition : Bags, totes & sacs – oh my!

and

featuring

It’s Vegan MoFo Day 17 (already!), and it’s W.I.P. Wednesday, so rather than  focusing on anything crafty I might be working on, I’m honoring Vegan MoFo  by featuring some of my favourite Vegan Etsy peeps.  When you make your purchases from Vegan Etsy sellers, you know you’re buying vegan, which is what we’re after.

Today’s first featured Vegan Etsy vendor is Vegancraftastic. So many cute things it’s crazy!  I’m partial to her bags, but she’s got much more than that.

I think this Wild Kingdom Christmas bag would be great for keeping my holiday knitting project W.I.P.s, don’t you?

I know, it’s not a bag – but this woodland dear pin set is so sweet.  She’s got lots of adorable pins and I want them all!

This next crafting vegan queen needs no introduction to most of you, after all she is the craft maker to the stars!  Kittee’s blog is a hoot, and her recipes keep my tummy happy, but dude!  Check out her Etsy Shop! Personally I’m in love with these Holly Hobby Goes Goth bags.

Holly Hobby can bring me next time she goes goth, just sayin’.  While you’re there, pick up a copy of Papa Tofu, because you know you want to!

Yes, please.

AltheaFae’s shop is our last stop today, and believe me, you’ll want to go visit!

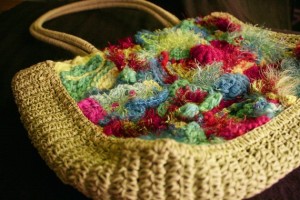
This bag is so delicious I want to eat it right up!  This Ooak Freeform crochet embellished bag is going on my Christmas list, fo sho!  Just beautiful.

And what about this cute little purse?  It’s just the right size for a night on the town..or a quick run to the store to buy some flour to make delicious vegan cookies!   AltheaFae is mighty talented, and her work has a lovely feeling of whimsy.

Who is your favourite Vegan Etsy artist?  Please share!

Don’t forget to enter to win some yummy tea!  Drawing closes tomorrow.

Vegan MoFo Day X : W.I.P. Wednesday & Vegan Etsy

Meets

in

The Holiday Shopping Season is Vegan This Year

In honor of Vegan MoFo, our regularly scheduled W.I.P. Wednesday posts will focus on some of my favourite Vegan Etsy artists and vendors.  If you’d like to know a little more about the wonderful Vegan Etsy team and all they do, be sure and check out their blog, ok?  Please do!

Will you be purchasing gifts for friends and family this holiday season,?  Be sure you give a look-see at the beautiful creations by the Vegan Etsy Team on Etsy.  You can visit the Vegan Etsy Team Marketplace for a lovely showcase of their member shops, or do a “veganetsy team” search.  Use your hard earned money on vegan-friendly gifts made by vegans!

Here are a few of my favourite Vegan Etsy peeps!  Today’s theme will be keeping in touch, a fitting theme for these holidays that we so often spend far from our families and friends.  Let them know you care with these adorable cards…

I would just love to send my friends and family these gratitude notecards by Jodi and Dan of Thisisit Creations.

The use only eco-friendly materials and create the most lovely stationary, notebooks and other beautiful things.  You must go see their Dachshund Spiral Notebook because it’s the cutest thing ever.  Santa, you could put that in my stocking, non?

This is the cutest freaking little turtle I’ve ever seen!  I mean, he’s wearing a Christmas hat for pete’s sake!  Who is responsible for such adorability?  ChirpCards, that’s who!

And just who is ChirpCards you ask?  Why it’s my sweet friend and blogger Amy of Tahinitoo!  This multi-talented gal makes more than just beautiful Hazelnut Shortbread, she is a genuine artiste.  You can even buy a 5-Card Set so you could send a sweet, hand-crafted card to 5 of your favourite friends (or 4 of them, and me).

Those vegans!  They don’t kill animals, but they are killing me with cute!  Feel like a cutie-attack?  Go visit the My Zeotrope shop, but I’m warning you, you’re going to want to buy everything that Michelle has up for sale!  You can visit her blog, too!

Any cuter, and I would burst. And that would be messy.

Be sure and tune in next W.I.P. Wednesday for more Vegan Etsy super-stars!

And because this is W.I.P. Wednesday after all, go see fellow Wipster WindyCityVegan and her adorable daughter in the Owl Costume she made her for Halloween!  The cuteness!


W.I.P. Wednesday : Meow! Halloween Kitties!

Let’s just pretend it’s Wednesday, ok? Great!

This is one of those too-easy-to-publish crafts, but the fact of the matter is that sometimes we forget that simple can be cute and fun. It’s two-dimensional, so there’s not messing with gussets – just cut two matching pieces of fabric and sew them together. Ta-da!

Guppy and I sat down to make some Halloween Black Cats together, and the entire project took about 45 minutes from start to finish, meaning : finding the fabric, drawing a template, cutting fabric and stitching up. If there hadn’t been interruptions like the telephone ringing, taking the dog out and gluing more googly eyes on yet even more Halloween Felties, it could have been done in an easy 15 to 30 minutes, depending on how many Halloween Kitties you wanted to make.

I just drew a basic silhouette of a kitty head, and used a simple ribbon for the tail. I cut out diamond eyes from felt, but you could embroider yours – or get more elaborate with a nose, mouth and whiskers.

Your Halloween Kitty needs a Kitty friend! Make many!

There’s still time to whip up a few Halloween decorations! Do you have any new W.I.P.s in the works? We would love to see what you’re up to! Snap a shot of your  “in progress” masterpiece and add it to the  W.I.P. Wednesday Flickr Pool. Whatever your works-in-progress, have a crafty week, and don’t forget to see what the other Wipsters are working on.

Valentines for my Valentines : Late Love Is Better Than No Love, Right?

Cascade de coeurs

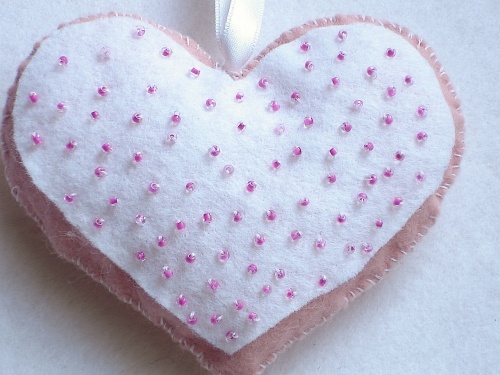
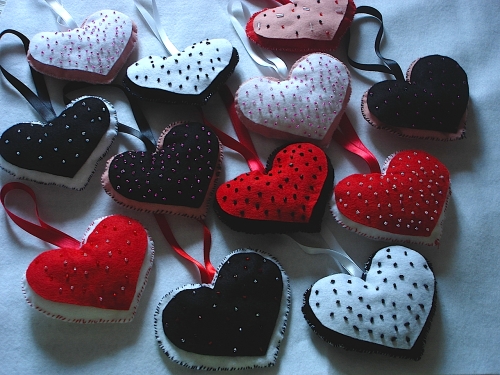
Here they are, the hand-made valentines I’ve been working on since early January (I started them on my birthday, actually). As mentioned in my previous post I don’t have much sewing or craft experience, so for the nimble-fingered, 13 felt and bead hearts don’t seem like a much of a feat, and I admit that doing them wasn’t difficult, but when I compare the first few hearts with the last few, the difference in the stitching is huge! When ever I had a few free minutes (my copious free-time is far from limitless, but you can always make time when you really want to do something, right?) I would add a few beads or cut out some hearts.

il pleut des coeurs

My goal was to get them finished before Valentine’s Day, and I did indeed manage that- I put the final touches on the last heart the morning of the 11th, but getting them into envelopes and in the mail, well, that just happened today.

Coeur Rose

Sending them regular mail, they should get to the States before Saint Patrick’s Day…

Coeurs

So here they are, and there they go. They are on their way to Michigan and to Arizona to remind the ones I love that I miss them so and that they are always in my heart. My poor belle-mère, my mother-in-law, had a heart attack two weeks before Valentine’s Day, so she got her felt heart early. She is recovering very well for her 75 years, and she had her felt heart hanging next to her bed in the CCU at the hospital. A healthy heart is what I wish for everyone this year. And lots of love, too!

Coeur Rouge & Noir