Hello & Happy New Year! Fruits, Veggies & Frogs!

Happy New Year to all you!  Here in France, wishing friends, neighbours and countrymen a happy new year, or une bonne année is a very big deal.  We don’t generally send out Christmas cards, the custom is  rather to send out des cartes de voeux or greeting cards for the New Year.

A word to the wise : it is considered to be bad luck, and even rude by the staunchier members of society, to wish anyone a happy new year before January 1st.  You’ve been warned.

Etiquette holds that you have until January 31st to wish une bonne année, so I’m still not technically late in wishing you all a fantastic 2012.  My sincere hope for you all is a fulfilling, joyous, rewarding and healthful year.

2011 could be known as “The year of the vegetable patch”.  I first broke ground  in late February, and you could say that other than coming inside to make jams or to can tomatoes, that is where I stayed.  I had a wonderful harvest, and consider myself very lucky to have made it through one of the driest years on the records with such bountiful crops.

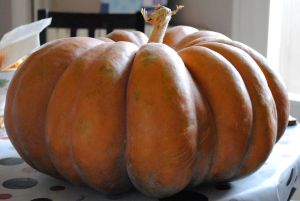
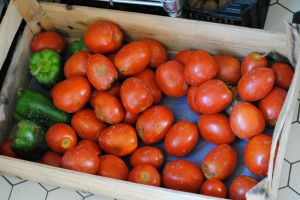
In February and March I planted garlic, onions; raspberry and strawberry plants.  After that came the green beans, beets, tomatoes (roma, marmande, and cherry),  various greens, hot peppers, green, yellow and red peppers, cantaloupes, watermelons and pumpkins.

My autumn planting started off well with broccoli and cauliflower, but I made a beginner’s mistake and didn’t scare off the catepillers…who in the course of one evening managed to chew their way into over 50 plants.  I learned my lesson, though.

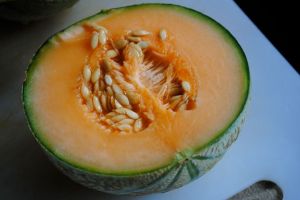
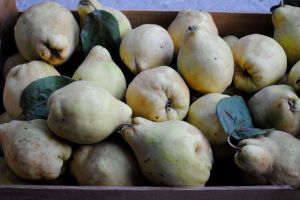
I made well over my weight in jams and preserves, entirely in thanks to new friends and neighbours who are the most generous I’ve ever known.  We were given or invited to pick: cherries, apricots, pears, nectarines, peaches, Mirabells and other plums, quince, and “jam melons”.

This is a local speciality, something I’d never tasted or seen before.  It looks much like a watermelon on the outside, but inside the fruit is yellow and rather sponge-like.  When my sweet neighbour and garden guru offered me a few melons to make jam with, I thought they were just regular watermelons…and began to panic when I cut into them and thought them to be rotten.  Concerned my gardening guide was a little off her rocker, I looked to the Internet and voila! The southwest treat known as confiture du mélon is a centuries-old tradition.  Relieved that neither my neighbour or the melons were off, I happily made a jam that reminds me of a lighter version of honey.

I want to say that I’ve missed you all terribly, and I sincerely am thankful for your emails and tweets!  One of my resolutions for 2012 is to reconnect with you, as your companionship these past 5 years has been both an inspiration and comfort to me.

How about some cute little frogs before I sign off?

The most beautiful family of frogs lives in one of the rain barrels.  Happy!

A Hopping-Good Easter Cake & 50-days Coffee-Free

Pardon the title, seems I’ve gotten really punny in English lately, I’m not sure what that’s all about.  Probably because since I’m not currently teaching*, the only English language use I seem to be getting is little blurbs on Twitter and of course chatting up my now 6 year-old (Gasp!).

Though I’m not Catholic, every year I give something up for Lent in memory of my dear, sweet Grams.  This year I decided to give up baking (as I have the past few years), but also, coffee.  Though my consumption habits have waned considerably in the past few years, I was still drinking a very strong “café italien” every morning, and often one after lunch.  I thought it was the time to give that up for a little while, since I was finding myself needing the coffee, rather than enjoying it.

Before my Lenten baking-fast, however, I did give this cake a trial-run :

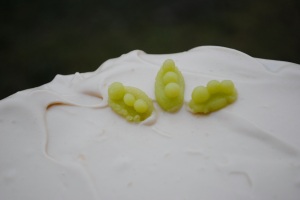
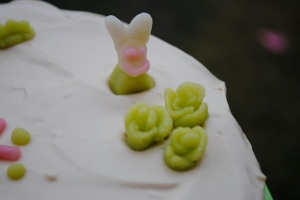
The cake, my go-to carrot cake recipe from 500 Vegan Recipes, was gussied up with some almond paste and a little creativity.

the only radishes my family will eat…

give peas a chance!

Happy bunnies love cabbages…

I suppose you could do the same thing with fondant, but since my local grocery store has all natural almond paste in green, pink  and white, and they are natural colours, I opted for that.  I’d seen the idea for the sculpted veggies in Marie Clare Idées, I think the February issue, but I don’t remember.

This cute cake was supposed to be my last baked treat for 50 days, but I went and volunteered to bake treats for Guppy’s school bake sale.  They asked for cookies,  and of course because as the only person around who has actually eaten an authentic chocolate chip cookie I was urged to make chocolate chippers. Figures.

They turned out a little less-than-authentic because while not paying attention to what I was purchasing I bought a bag of chocolate chips mixed with shredded coconut – and I wasn’t about to go back to the store for plain chips.  They were extra delicious (made from Isa’s perfect recipe in VCIYCJ) and no one complained, and they were bought up in no time at all.  And yes, I did eat one. Or four.

Giving up coffee was awful, as most anyone who has ever detoxed from the stuff will tell you.  The first two days were actually ok, with me just feeling a little too smug about how easy it was.  Then, the headaches started, or rather, the headache started.  It lasted for about 8 days straight, and nothing really seemed to help ease the pain.  I was also a little bit (very) cranky on days 3 and 4, weepy-cranky actually, but then it was over.  I allowed myself all the tea I wanted, but psychologically it’s not the same deal at all.

The positives of this coffee-free existence were really surprising to me, mostly because I didn’t think that I was drinking enough for there to be a negative impact on my life.

1) More Energy : I found myself full of energy, more than usual.  There was no early-afternoon “I want a nap” feeling which really surprised me, and I actually found that I needed less sleep at night – about 30 minutes less.

2) Faster Recovery & Lower RHR : From a runner’s point of view, I’d always seen coffee as my friend, a silent partner in my training.  I’ve read a fair amount of literature on the matter and felt pretty good about my relationship with coffee, especially my pre-morning run cup.  Turns out, coffee wasn’t such a great friend after all (words I never though I’d type dear readers).  I didn’t make the connection initially, but my RHR (resting heart rate) seemed to be dropping though my training was increasing.  I initially and oh-so-modestly chalked that up to my being in rocking shape.  Then, I noticed that my training HRs were also slightly lower, and began paying even more attention.  It wasn’t until bringing coffee back into my life that I noticed my RHR sneaking up by about 8 bpm.

3) Better Concentration : After the detox stage, I found I was better able to concentrate on any/all things throughout the day.  The mental clarity that accompanied my coffee-free life was a real surprise, especially because I thought coffee actually helped improve concentration.

The negatives of giving up “Joe” were mostly social – everyone seems to get edgy call and even feel judged when faced with questioning their own habits.  The reactions of other people – friends and family members – reminded me of those I see when there are discussions of veganism in the air.  For most folks it’s not big deal, they just shrug their shoulders and move on to the next thing, but for others, there was a bit of defensiveness and disapproval and comments like “well, you can’t give everything up” start flying…

Yes, I did bring coffee back into my life, though I admit it was rather anti-climatic.  I had misty-eyed memories of cafination, the aroma, the “glow” if you will, of my morning cup, but in reality I found myself with an extremely elevated HR and feeling jittery.  I was also frustrated by the return of the afternoon sleepies and mental dullness that seem to accompany them in the early afternoon.  I’m drinking less, and though I do still love coffee, I think I’m much more careful about just how much I consume per day.

Have you ever given up coffee?

*That being said, I am looking for some part-time work kids, so if you need any translation, editorial writing or French/English lessons, do let me know, please?

W.I.P. Wednesday – Sewing & Sowing…

Hi kids!  I’ve missed you, really I have, and I’ve been thinking of most of you (well, not you lurkers since I don’t know who you are) whilst playing in my garden.  I think my vegetable plot and garden have become the most cared-for of “works in progress” around the Fish household.  I will share a full-on garden-nerd post soon, but this post is really about getting you caught up on a few crafts I have managed to pull off…a little sewing in between the sowing, if you will…

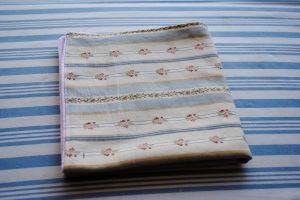
When last we “W.I.P.”ed together I told you about the cloth napkin I was making for Guppy which was going to double as a doudou.  I’m thrilled to say that it was a success with both Guppy, who loves it and uses it for sadness-free lunches at the school cafeteria, and also with the school’s auxiliary staff who are thankful it’s so easy to recognise and has her name embroidered on it (making noon-time napkin identification much easier for them!).  The pink cotton side is from one of Guppy’s receiving blankets, and the cotton canvas fabric was a gift from a good friend, so lots of great lovey-vibes went into the making of this napkin.

This was my first embroidery project that was to get so much use, and I admit I was a wee bit concerned about it initially.  It’s been washed loads of times so far, however, and has stood the test of abuse just fine.  The only bit that’s been wonky is the, for lack of a better word, “slishy” blue floss I used for the poodle.  I don’t think I’m going to be using this floss for anything in the near future as it just keeps slishing and sliding itself untied and I end up with a few sloppy stitches after the wash, but it seems to be fixed now.

The other project of interest was these little heart pins Guppy and I made for her teachers and the staff at her school :

Guppy picked the colours for the fabric and the embroidery floss, assembled the halves, and I did the stitching.  I found these adorable checked wax-paper bags in my workshop – I wish so much I could remember where they came from because I want more! – and we put a giant heart-shaped vegan sugar cookie with lemon icing and heart sprinkles in each bag, delivered with each heart pin.  They were the perfect fit, and made giving a sugar cookie a little more elegant, really.  I mean, sugar cookies are classy, but that just added a little touch of professionalism to the deal.

Do you have any new W.I.P.s in the works? We would love to see what you’re up to! Snap a shot of your  “in progress” masterpiece and add it to the  W.I.P. Wednesday Flickr Pool. Whatever your works-in-progress, have a crafty week, and don’t forget to see what the other Wipsters are working on.

Meal Plan Mondays & Hazelnut Sandies with Barberries

Lots of yummies on this weeks list!  But first, how about a cookie recipe?

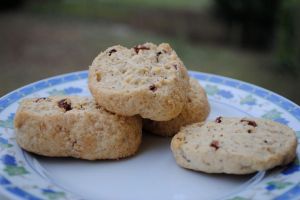
I know you’ve been waiting for the English translation of the last Francophone Fridays post, the sablés aux noisettes aux baies de bérberies (dans la langue de Molière) or Hazelnut Sandies with barberries (in the language of Shakespeare).

When the adorable Mihl and P. finally came visit us last year, they came with loads of goodies for us to eat.  One of the special treats they lugged with them across Europe (well, from Germany to south-western France anyway) was a bag of beautiful dried barberries!  Mihl uses them in some of the many recipes she has on her blog Seitan Is My Motor, and I couldn’t wait to try them for myself!  If you’re unfamiliar with these tart Persian berries, you can read a little  over at Wiki if you’d like.

Once I had the coveted berries in my possession, I found myself  wondering what to do with the little gems.  I had too many ideas, but a limited supply of berries, and I didn’t want to squander them on just any-old recipe where dried cranberries or currents could be used.  Then, it hit me (gently, I wasn’t harmed).

We have lots of things in common, my dear Mihl and I, among which dear memories of our sweet grandmothers.  I decided to honor their memories with these cookies, heavily-inspired by one of my great-grandmother’s recipes.  These sablés (sugar cookies) or “sandies” as my great-grandmother Mary  called them, are subtle and sophisticated with a lovely duo of textures : crumbly, buttery sugar cookie and sweet and tart dried barberries.  The ground hazelnuts  add just a hint of bitterness which plays wonderfully with the brown sugar-encrusted cookies.   If you don’t have barberries, dried unsweetened cranberries would work well, though I would probably dice them up, or try dried currents.

Hazelnut Sandies with Barberries

For about 40 cookies – advance preparation required!

2 tsp Ener-g Egg Replacer

2 tbsp water

175 g non-dairy butter, room temperature

2 tsp lemon juice

1 tsp vanilla extract

180 g sifted powdered sugar

300 g AP flour

2 tbsp cornstarch

1 tbsp baking powder (11 g)

120 g ground hazelnuts

110 g dried barberries (or cranberries)

4 tbsp brown sugar

1) In a large bowl combine the flour, cornstarch, powdered sugar, baking powder and ground hazelnuts. Set aside.

2) In a small mixing bowl or in a food processor, whip the water and Ener-G until it’s frothy, at least 3 minutes.

3) With an electric mixer, cream the powdered sugar and butter until it’s light and fluffy, then add the Ener-G, lemon juice, and vanilla.  Continue mixing until well combined.

4) Now add the flour, a little at a time, then fold in the barberries.  Divide the dough in two.

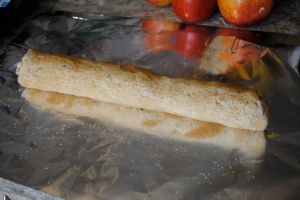
5) Spread half of the brown sugar on a piece of tinfoil about 30 cm long.  Lightly flour your hands, and roll one half of the dough into a log about 20 cm long.  If you’re having a difficult time working with your dough, try dusting it with some flour, a little at a time, and it will be easier to work with.  Go with your gut, and if the dough is very sticky, just knead a little flour in until it’s “workable”.

6) Gently roll the log through the brown sugar, covering the exterior.  Add a little sugar to the foil if there are some sugar-free spots.  Roll up the log with the foil, twisting the ends shut.  Do the same with the other half of the dough, and refrigerate for at least two hours.

7) Pre-heat the oven to 175°c and prepare two cookie sheets with silicon mats or parchment paper.  Gently unroll the dough and slice cookies 15mm thick, wiping the knife clean each time.  If you’re having a difficult time slicing the cookies, don’t fret!  Just cover it back up and put it in the freezer for about 15 minutes, then try again.

VIII) Bake for about 13 minutes, until they are just firm and lightly browned on the bottom.  Let them cool slightly for about 5 minutes, then transfer them to a cooling rack.

Now for this week’s Meal Plan :

Monday : crêpes sucrées et salées (savory and sweet crêpes) with sautéed mushrooms and onions for the savory, and powdered sugar and lemon juice for the sweet.  So. good.

Tuesday : Risotto with mushrooms and peas, served with braised dandelion greens.

Wednesday : Polenta with garlic gravy.

Thursday : Hot & Sour Carrots and Lentils, a tester recipe for The Urban Vegan.

Friday : Pizza Night!  How I love you so…

Do you blog your weekly meal plans?  Super-cool world-traveler Vegan Snorkler  has one up today.  Let me know, I’d love to link to your plan to share the planning mojo with everyone.  And don’t forget, if you’re looking for meal plan inspiration you can visit the MPM archives.

The doudou disguised as a napkin : W.I.P. Wednesday

After being a bit over-zealous in the furniture-lifting department I hurt my traps last week, which meant not much blogging, knitting or much of any activity.  They are feeling better now, though, which is good, because as you’ve noticed I’m out of pre-written posts – I’m blogging by the seat of my pants!

Some of you might be wondering what a doudou is.  In French, a doudou is an object of substitution children use to feel secure when apart from their parents : a blankie, stuffed animal, dolly, etc.  I’m pretty sure you’ve worked out “napkin” for yourselves.

The French school day is a bit longer than in many other countries :  5-year-old Guppy’s classes begin at 9 a.m., she has a two-hour lunch break from noon to 2 p.m., then classes until 5 p.m.  (Some children stay at the after-school programme /day care, making it an even-longer affair).  Though it hasn’t always been the case, I’ve been able to fetch Guppy and she’s had lunch at home with us since September, which she loves.  It’s much calmer, and she gets to read or play in her room (or snuggle her mamafish).

This is going to change, however, and she’s going to be eating once a week at la canteen or school cafeteria, much to her chagrin.  Her response to the announcement was, “but Mumma, I love you too much – that’s too many hours!”.   There’s no way around it, however, even if it’s hard to see your kiddo in distress.

So what do you do?

You make a doudou!

But shhhh!  It’s a secret doudou, don’t tell anyone!

The children bring a cloth napkin on the days they eat at the cafeteria, so I’m getting all Jamie Bond and making her what appears to be a napkin, but in reality, it is a secret, soft and reassuring doudou.

I’ve embroidered her name, and she picked out a few designs she wanted to  use to embellish it.  The above poodle is from the Stitch-it-Kit which has lots of cute retro designs I never use, but because I wanted to empower the Gup I handed her the box of transfers and let her pick out what she wanted (so glad she didn’t go with the hula girl).

The napkin will be made of two layers of fabric : a cotton twill, functional but cute (it has flowers on it, she picked it out) and the other side (the doudou side) is soft pink flannel I cut from one of her receiving blankets.  I assured her I would put lots of extra love between the two layers so that if she starts to have a gros chagrin (wave of sadness) she can give it a squeeze and she’ll feel better (I strongly suggest adding extra love if you’re trying this at home.  A little love is good, but not potent enough).

I just started it last night, so I haven’t finished yet, but I’ll show you next week…if you promise to keep this under wraps!  We don’t want any unnecessary teasing at school now, do we?

Do you have any new W.I.P.s in the works? We would love to see what you’re up to! Snap a shot of your  “in progress” masterpiece and add it to the  W.I.P. Wednesday Flickr Pool. Whatever your works-in-progress, have a crafty week, and don’t forget to see what the other Wipsters are working on.

Sablés aux noisettes & aux baies de berbéris : Les Vendredis Francophones

Quand l’adorable Mihl a décidé enfin de me rendre visite l’année dernière elle n’est pas venue les mains vides!  Parmi les trésors qu’elle a gentiment apportés avec elle  à travers l’Europe (ou bien, de l’Allemagne jusqu’à chez moi en Aquitaine) se trouvait un sachet de jolies baies de berbéris!  Elle en parle souvent et les utilise dans ses pâtisseries, donc j’avais hâte de les découvrir.  Vous ne connaissez pas les berbéris?  Allez faire un tour chez wiki pour plus amples infos sur ces petites baies acidulées pardi!

Une fois les berbéris en ma possession, que faire avec ces petits rubis comestibles?  Je n’étais pas en manque d’idées, et le plus dur était de me décider, ce que je fit enfin!

Il faut dire que nous avons beaucoup de choses en commun, Mihl et moi, parmi lesquelles nos chers souvenirs d’enfance avec nos grand-mères respectives.  Je voulais donc essayer de leur faire honneur avec cette recette, inspirée par mon arrière-grand-mère.  Ces sablés sont  sophistiqués dans leur subtilité, avec un mélange de textures surprenant, entre le croustillant du sablé sucré et les baies séchées acidulées.  La poudre de noisette ajoute une touche d’amertume qui joue avec la délicate douceur du sucre roux qui les entoure…si vous n’avez pas de baies de berbéris, des “cranberries” séchées non-sucrées feront l’affaire.

Sablés aux noisettes & aux baies de berbéris

Pour 40 biscuits environ

2 c. à café Ener-G (pour remplacer 2 oeufs)

2 c. à soupe d’eau

175 g beurre végétal (St. Hubert Bio), ramolli

2 c. à café de jus de citron

1 c. à café essence vanille

180 g de sucre glace tamisé

300 g de farine ménagère

2 c. à soupe Maïzena

1 c. à soupe levure chimique (un sachet de 11 g)

120 g de noisettes en poudre

110 g de baies de berbéris (ou cranberries séchées)

4 c. à soupe de sucre roux

1) Dans un grand saladier mélanger la farine, la maïzena, la levure chimique et la poudre de noisettes à l’aide d’une grosse cuillère.

2) Fouettez l’eau avec l’Ener-G à l’aide d’un mixeur électrique jusqu’à ce que ça mousse, 3 ou 4 minutes environ.

3) Dans un autre saladier, travaillez en crème le sucre glace et le beurre jusqu’à ce que le mélange blanchisse.  Ajoutez l’Ener-G, le jus de citron et la vanille en continuant de battre pour obtenir une pâte homogène et très légère.

4) Incorporez le mélange de farine, petit à petit, puis les baies.  Divisez la pâte en deux.

5) Etalez la moitié du sucre roux sur une feuille de papier aluminium d’une trentaine de cm long.  Farinez vos mains, et avec un des pâtons, formez une bûche ronde de 20 cm (si votre pâte est trop molle, malaxez-la avec un peu de farine, elle sera plus facile à manipuler).

6) Roulez doucement la bûche dans le sucre roux afin de bien garnir son extérieur.  Enveloppez-la ensuite dans une feuille d’aluminium en fermant les extrémités en papillote.  Faites pareil avec votre deuxième pâton, puis, laissez-les reposer au frigo pendant deux heures.

7) Préchauffez le four à 175°c et préparez 2 plaques de cuisson avec des silplats ou du papier sulfurisé.  Retirez l’aluminium et détaillez chaque bûche en tranches de 10 mm.  Si vous ne pouvez pas couper votre pâte facilement, mettez-la au congélateur pendant 15 minutes, puis réessayez.

8) Enfournez les biscuits pendant 13 à 15 minutes, jusqu’à ce qu’ils soient fermes et dorés en dessous.  Laissez-les tiédir 5 minutes avant de les mettre à refroidir sur une grille.

Miam!

Kid-Friendly Easy-Peasy Pasta (or the recipe that isn’t really a recipe)

I could count on one hand the number of times I’ve had fast-food anything in the past 10 years…but “fast-food”, that is to say, foods that can be prepared quickly, do have their place in our family’s meal repertoire.

With Guppy and Monsieur F. home every day for lunch, I try to keep things interesting, nutritious and affordable.  And quick.  While there are lots of  healthy and delicious things that I can whip up in just minutes, not all of them pass the Guppy-test, but this one does and it’s ready to eat in less than 30 minutes.

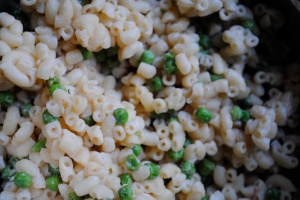
I’m not going to complain here : our daughter was the easiest kid in the world to feed for 4 years.  She’d eat just about anything from spicy lentil curries to tapanade.  She’d have her moments, but generally was very easy to please.  However, since turning 5 she’s gone into a more curious food-phase where she likes everything, sometimes.  One day she’ll love artichokes, the next will gag on them.  I let it go, because as my dear Mamafish would say, “if she’s hungry, she’ll eat.”, but it is still nice to see her clean her plate.  Broccoli, peas, spinach and mushrooms are still her top 5 foods, so I try to use them as often as possible, and will sub one of the above for the peas in this dish…but I didn’t want to lose the cute name and call it “Mushy-peasy Pasta” or “Easy-ccoli Pasta”.  But maybe I should?

Kids love me, you’ll see!

Easy-Peasy Pasta

For the child who doesn’t like rice or peanut butter & jelly sammies.

500 g whole-wheat pasta (mini-macaronis are our favourite)

Pot full of boiling, salted water

1/2 cup diced onion

1 tbsp olive oil

2 tsp balsamic vinegar

3 tbsp non-dairy butter

3 tbsp nutritional yeast

3 tbsp soy cream, soy yogurt or non-dairy milk (in order of preference)

2 to 3 handfuls frozen peas, rinsed under hot water

1 or 2 diced meatless-dogs or sausage (optional)

Salt and pepper to taste

1) Prepare the pasta according to package instructions.

2) While the pasta is boiling, sautée the onion in the olive oil until translucent, about 5 minutes or so.

3) Add the balsamic vinegar and set heat to low, stirring to keep the onion from sticking, then add the butter, soy cream and peas and stir until combined.

4) Drain the pasta and return to the pot, add the balsamic onion mixture and the nutritional yeast and stir until combined.  Add optional soydogs (if you’re in North America you can use Yves and I’m jealous!) and salt and pepper.

5) Youppie!  Eat a happy meal with your kidlet!

*I feel kind of guilty calling this a recipe, because it’s just pasta…but pasta with stuff, makes it fancier, right?

Paratas, Please!

Para-whats?  Paratas!  Reminiscent of a Mexican tortilla, paratas are my go-to flat bread when it comes to Indian cuisine.  They are easy and really quick to prepare; it’ll take about 35 minutes total : 15 minutes down time while the dough sits, 15 minutes preparation, and about 5 minutes cooking time.  Now that’s my kind of fast food!

Like many small-town kids, I didn’t have my first taste of “real” Indian cuisine until my first visit to London.  Still in high school, I stayed with a wonderful young host family who would never have allowed me to step foot in a regular old Indian restaurant, no sir!  My curry-baptism was to be home-cooked, thank you very much, made with love and care.  Pauli, aka host-mum and chef extraordinaire, showed me how to make paratas that night – it was the first time I’d ever really done anything in the kitchen other than eat!  It was such an amazing evening – and I think of my sweet little host-family every time I have paratas.

Don’t let the directions intimidate you – you’ll see, it’s really easy!  Just follow these simple steps :

Our favourite paratas

for 8 paratas

300 g whole wheat flour

1/2 tsp flax seeds (optional)

1/2 tsp sunflower seeds (optional)

2 pinches of salt

200 ml soy milk

8 tsp non-dairy butter

1) Using a wooden spoon, mix together the flour and salt in a large bowl.

2) Add the soy milk, a little at a time, until a smooth-ish dough forms.  Knead it just a little bit : if it’s too sticky add a little bit of flour, or  add a little soy milk if it’s too dry to stick together.

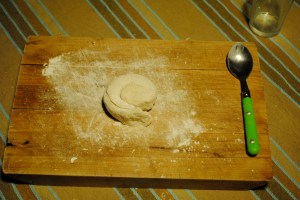
3) Form into a ball and let it rest 15 minutes.

4) Now divide the dough into 8 balls.

5) Roll out the balls to form little tortillas, about 15 cm in diameter.

6) Put a 1/2 teaspoon of the butter on each disc, and spread it a little.

7) Now roll up the paratas so you get 8 cigars.

8) Let’s make snails!

9) Roll each snail out so that you get again 8 discs.

10) Now cook the paratas in a non-stick pan with a little melted butter over high heat.

11) Paratas are best when served hot from the pan, so serve and eat as soon as possible!

*Sorry for the yellowish pictures…it’s still dark come dinner time!

Meal Plan Monday & Tester Yummies

Before I get to this week’s plan, here are a few of the great eats I’ve been testing for The Urban Vegan :

Delicious cinnamon-date scones

Kheer (Indian Rice Pudding)

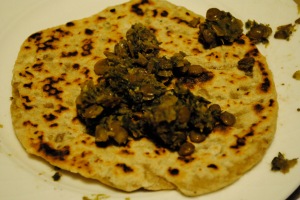
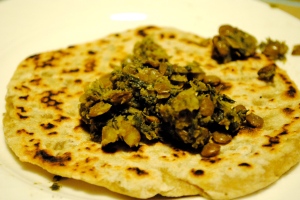
And to round things out, some Chana Dal served on homemade paratas.  I obviously can’t give you the tester recipe for the Chana Dal, but you can see the recipe for the paratas here in French, or wait until tomorrow for the English version.

Did you see who was sneaking into my Kheer photo shoot?

I was taking the shot and wondered what had fallen onto the table…baby lady birds! Or lady bugs, or cute bugs that announce spring!  Happy.

Monday : Easy-Peasy Pasta – watch for this very kid-friendly recipe on Thursday.

Tuesday : Balsamic Baked Beans (an U.V. tester recipe) and sweet potato fries.

Wednesday : French Fry Soup.  This is going to be an experiment, and I promise to share the results if it turns out!

Thursday : Spaghetti and bean balls.  I usually use the wonderful recipe for bean balls in VCON, but I’m out of gluten flour.  It’s all gone, kids, and apparently I cannot get any unless I order it via the net…and I’m not going to do that.  Have any of you made the recipe without the gluten to hold it together?  Do you have other bean ball recipes you like that don’t call for gluten flour?  Do tell!

Friday : Pizza Night!  Wee! If I’m feeling frisky I may even make a dessert pizza Friday.  Maybe.  Can’t be getting to crazy now, can we?


Do you blog your weekly meal plans?  Let me know, I’d love to link to your plan to share the planning mojo with everyone.  And don’t forget, if you’re looking for meal plan inspiration you can visit the MPM archives.