

Last week I blogged about the famous “Cookie Cutter” ornaments I make every holiday season, and about how quick and easy they are to make. Then, after an email and a few comments it dawned on me that easy is a rather subjective word. For someone who has never tried to thread a needle or tried to sew (gasp!) for fun, well, not so much.
If you’ve got sewing experience then this post will probably bore you, but if you’ve got pointers or URLs with other more basic holiday projects to share in the comments section, please do.
So let’s sew up an ornament together! It’ll be fun, promise. You’ll need a few basic things to get started, things you may already have around the house!

What you’ll need :
- Cookie cutters or other shapes you can trace as patterns, unless you’re going to free-hand your drawing, which is also fun, especially if working with little kids who love seeing their drawings “come to life”.
- Sharp scissors
- Thread – So many choices! Cotton thread, or thicker, more durable craft thread, embroidery thread (you’ll want to use about 2 or 3 strands) or even some thin cotton yarn. I have also used very thin satin ribbon which is pretty, too.
- Fabric – Before you run out to buy some, or think you can’t give the project a go because you haven’t any, just stop. You can use nearly anything! A re-purposed dish towel, the sleeve of a torn cotton shirt, bits from a stained table cloth, etc. You can also use heavier craft paper – it looks lovely sewn.
- A needle for sewing and some pins to hold your fabric together. In a pinch you can use tape to keep the pieces together, and even paper clips.
Get your fabric and fold it in half, with the right sides together. This just means that the side of the fabric you’d like to see once your decoration is done faces the inside for now.

See what I mean? The red-checks are facing in and the boring backing is facing out. Perfect for drawing or tracing on. Because we make a few new decorations every year, they are like little snap-shots of the past. We love dinos, so we make a few each year. If your child (or husband) likes super heroes, try a cape with an S on it, or maybe an outline of a car. Don’t worry about it not being traditional! I still need to make a zombie for Monsieur Fish, because that’s what he loves, but haven’t got it worked out yet.
Once you’ve traced, pin the fabric together and cut it out, going through both layers of cloth.

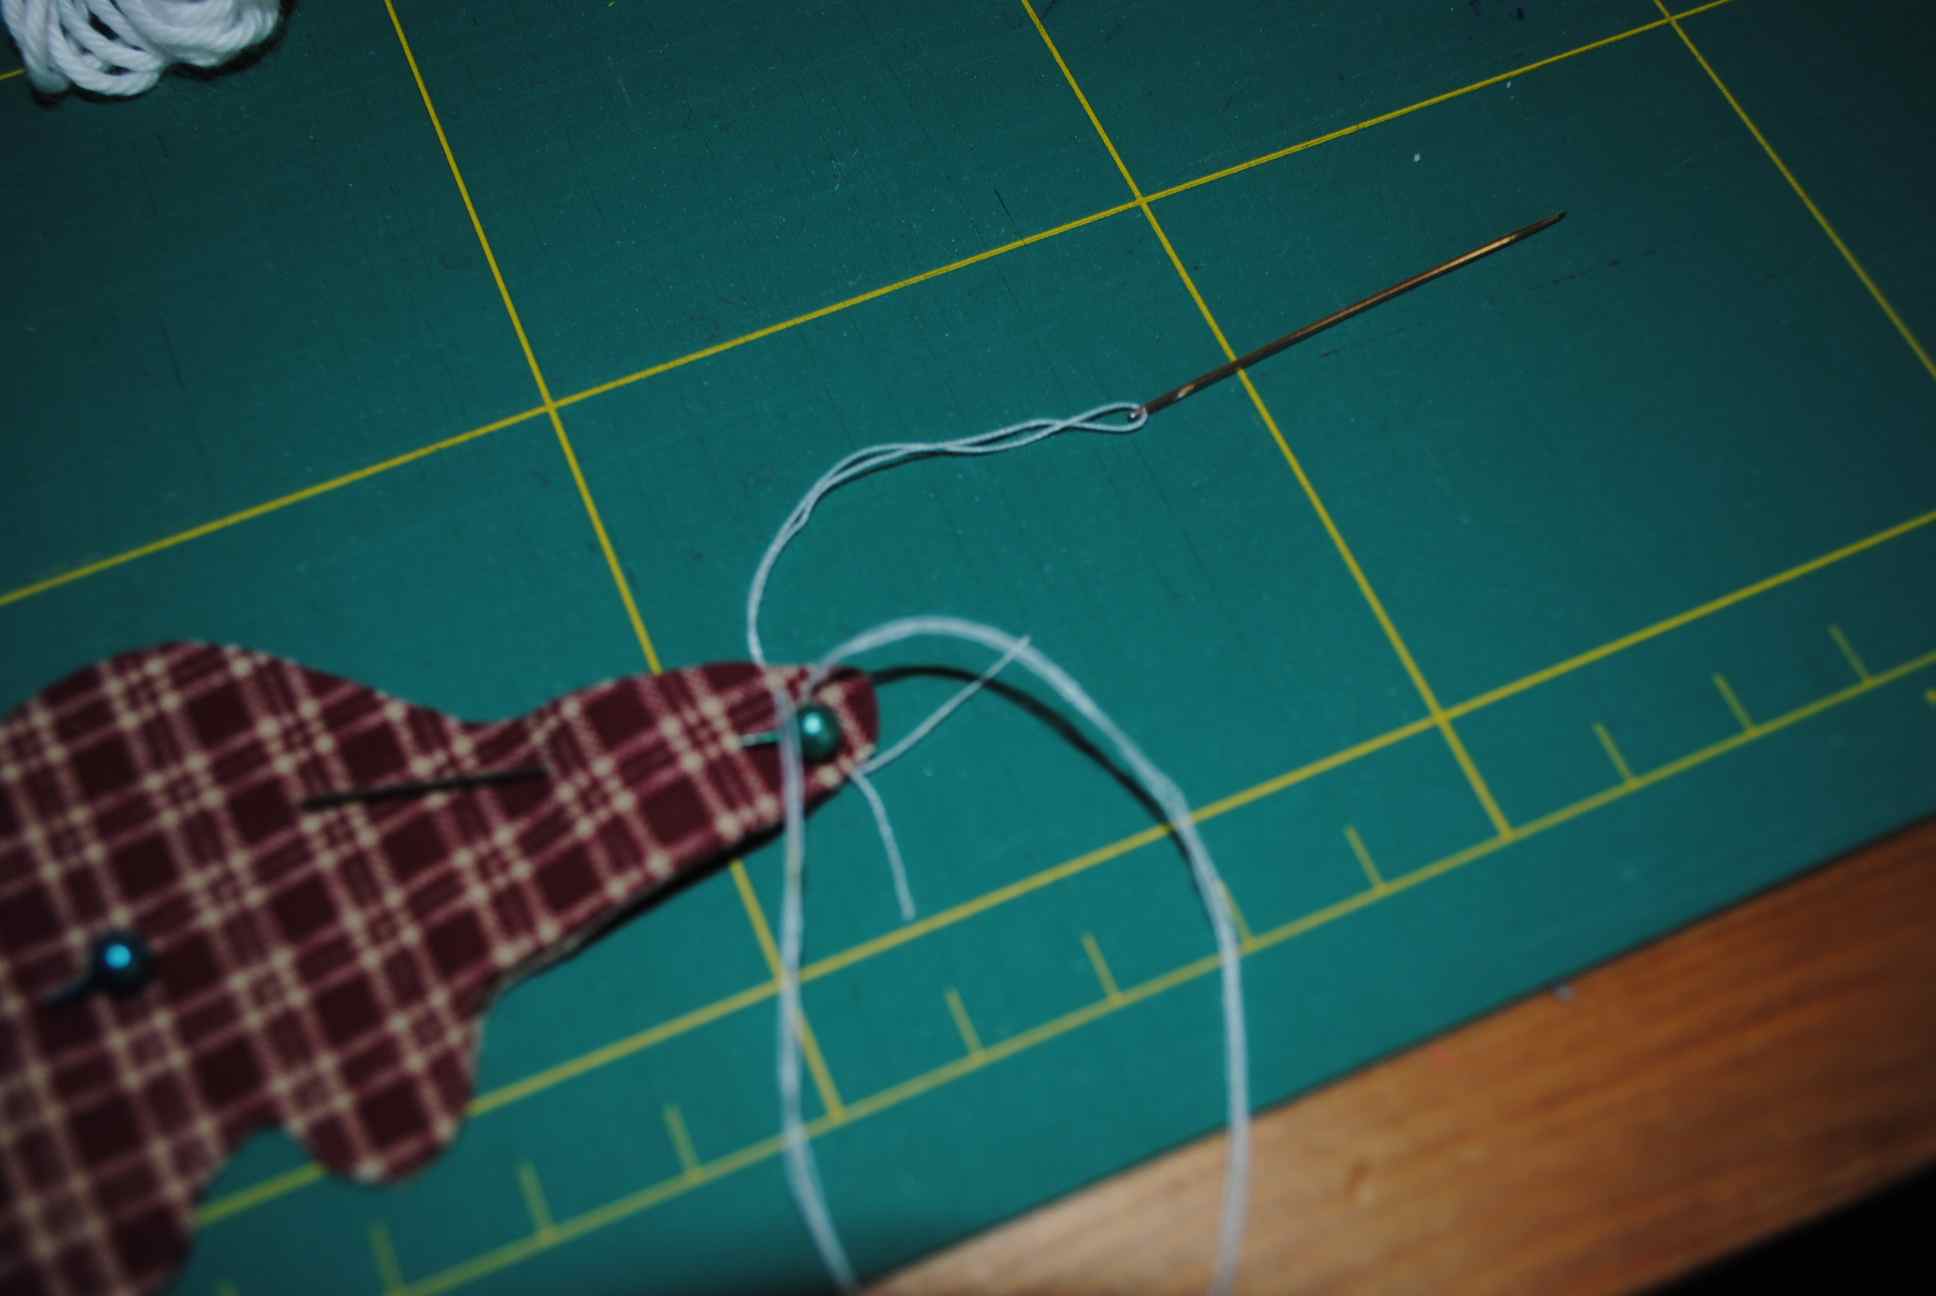
Now put the wrong sides together, right sides facing out, and pin to secure. Ready to sew? First, let’s look at your needles…

Notice how the top needle has a rather large eye and a blunt end? That’s an embroidery needle, so it can handle thicker threads, embroidery thread, yarn and ribbon. The tinner, sharper needle will work with cotton or nylon thread. Let’s thread your needle!

You want to have a workable length of thread, not too long or it’ll get tangled up, too short, and you’ll be re-threading often. About from your hand to your elbow is a good size I think. If you’re using regular cotton thread, just feed one end through the eye of the needle, then bring it to meet the other end so you’ve got a double-layer of thread (more sturdy). If using embroidery thread, take two or three strands, feed one end through the needle and pull to about half-way the total length, then knot the long end. It’s already sturdy enough so you don’t need to double up.

For your first stitch, you’ll begin going from the inside of your “sandwich” of fabric from the wrong side of one piece to its right side (meaning outside the dino here). Gently pull until the knot is against the fabric, and tuck in or carefully trim any little tails that are left. We’re going to do a straight stitch here, but to make things even easier, think of it as an in and out stitch. You just bring the needle through from one side to the other, all the way around your shape. Stop a bit before getting all the way around to stuff it if you’d like. You can use scrap yarn and thread, or cotton or nylon batting. Then sew up the hole and tie a knot to secure.

I hope this is helpful, and inspires you to make a few ornaments for your tree or window or potted plant or whatever. The tutorial for the Felt Doughnuts may also be helpful for you, too. They also make cute decorations for you tree, Jeni Treehugger says so herself!
Here are a few flashed-out examples of other shapes to try…


Pingback: W.I.P. Wednesday : Basic Un-lined Felt Stocking « Musings From The Fishbowl
The only thing more awesome than a dino cookie cutter is a dino tree ornament! This just might be the first sewing project for my son. Thanks!
Haha! My dino soul-mate-mamma! We’re actually doing salt dough decorations, too, and of course there will be dinos!
that’s so easy, Shelly – yay! i love the dino and i like the little heart, too. something non-traditional is right up my alley! i’m gonna have to stop by a craft store this weekend and see what i can get. i think dan has some pins and sewing scissors, maybe goodwill has some fabric and i can get some fun thread at the craft store. w00t! i’m all excited and inspired! thank you so much for the step by step, i wouldn’t know where to begin as i haven’t sewn and i am sure i would have fubbed it all up. ahahahhahaaa! thanks again, Shelly!
That is great, Jessy! Please let me know if you do make some, ok? I can’t wait to see what you come up with!
I have had gingerbread men cookie cutters for ever! but have never used them for cookies!!! This gives me a perfect idea to use them with some wonderful Christmas fabric I already have!
Thanks for the idea, it’s wonderful!!!
Have a splendid Holiday season!
Hooray crafts! Those are so cute and easy. 🙂
Dinos on the Christmas tree? Now I want Christmas decoration!
Ha ha! I knew we could talk you over to the dark side…
Thanks for the step-by-step for the sewing challenged! This is such a cute project!
You must have the most adorable Christmas tree there is! I love your ornaments. I need to take the time to make some; it’d be the perfect thing to do while watching the snow fall and enjoying a warm mug of hot chocolate…
cute! I need to make some of these soon. We don’t have our tree yet but most of my ornaments are old and each year i open the box more are broken…
Great idea!